
b) Nose-artwork
US-fighters are well known for their sometimes very colorful
artwork on their aircraft, not only on the bombers. We will
now add such a picture to our 'Snake'.
There are two basic ways to make nose-art for your
aircraft:
1.: From scratch, that is you paint it with the airbrush and other tools directly on
the skin. This method is fine if you are skilled at
these things.
2.: You already have an
interesting picture of artwork you would like to use, maybe on
a color-plate.
I will explain here how to create nose art using the second option, because often people add squadron-emblems and such things to their planes that are already shown in pictures. I will add this picture to my P-39, actually not WWII, but an interesting picture, the Mig Alley fans may know it:
 |
 |
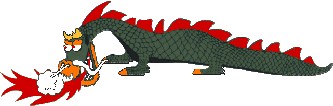
F-86F-1-NA
Sabre, 51-2897, "The Huff"
Lt. James L. Thompson, 39th FIS, 51st FIW
Korea, 1951
Skin by Mike McCaulk, http://ma-skins.frugalsworld.com/
1.: First we need a good base
to use the picture. Go to the Skin-file and take with the Dropper a common green-shade from
the nose of the Airacobra . I used the color-No. 168.
Then open your noseart (24bit, as always!) and choose the Floodfill-tool, tolerance 120 with
full cover in RGB and make green the white background of
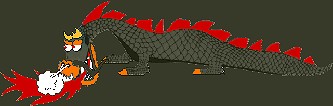
"The Huff" - note that the Dragons teeth and it's breath are NOT background, you may experiment a bit
with drawing the frontier-lines a bit stronger so you can
floodfill the whole thing good enough ![]() .
.
If you use an emblem for a squadron, then you'll have to do this procedure, too. Choose the average
background-color of the position where the emblem should be, and
fill up the background of the badge you want to add. You may
need to copy your artfile into a bigger file for the next
procedures.
2.: Since the green of
'Huffy' does not fit the EAW-palette (give it a try and you
will find that out quickly), we'll choose the Finger and its very last option,
the Color fit. Move over the green parts - maybe first
selecting with Magic Wand the red parts with some tolerance
and extend the choice to similar areas (menu
"Selection") . Do this then invert the choice by pressing [Ctrl][Shift][I].
 |
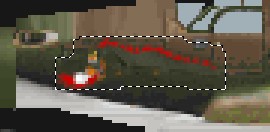
3.: 'Huffy' is still far too big for the skin, so we
can reduce the size of the picture dramatically - about the
final 17% - until it fits our needs.
After you've done this, select the Magic Wand, tolerance 0 (so it only takes the green you used as
background) and sharpness about 3. Select the background, by
pressing [Shift] you can choose multiple elements. You
will notice that the wand selects a blur of green when you do
that - don't panic. After you've selected all elements,
invert the choice by pressing [Ctrl][Shift][I] and copy this
selection into the skin-file to the place where it is supposed to
be:
 |
The selection with
a sharpness of about 3 gives 'Huffy' a kind of green
faded-frame , this is perfect to include it to the 24bit-skin
file!
Again, draw out the lines with the brush , as with
the codes, that are now covered by the Dragon, to get a more
realistic effect.
4.: Because every Dragon needs a name, we are going to
give this one a name, too.
Chose the
Text-tool, a decent looking
font and the size of about 3-4 and write a cool name, like
"Huffy's Dream", maybe in EAW's yellow (taken with the Dropper from the propeller-areas) and place it
where you want it to be. Don't be disappointed, nobody can read
this - but at least something is written there. Many people try
to enlarge writings on skins, but I prefer having at least the
intention that there is something written, not worrying about
what it actually says. If you don't want the writing horizontal, use the Deformation-tool.
Here again, you need to fit the panel for the right side, which is found on the right bottom of the pcx-file, next to the pilot. Use an element-mask and copy/paste. Open the EAW-palette, let PicPac work and paste the tpc-file as usual into your EAW-directory.
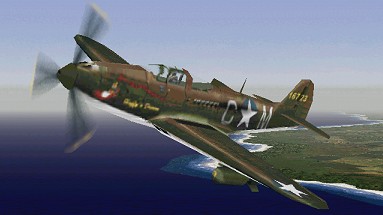
Ok, let's take our Huffy off for a ride over New Guinea:
 |
Ready for the next step?