
c) Recognition markings
Making
recognition bands for the wings provides some
possibilities for making color-changes to areas of skins,
i. e. tail-rudders, wing-tips, etc.
An obvious method to create a bright band on the wings is
to take the Shape-tool and draw a white figure to the wings,
finito. But then you loose a lot of surface-detail, so we
here we'll use a different technique.
1.: Select a band on the upper wing with the Selection-tool, so it looks like this:
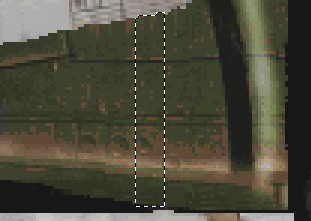 |
2.: Copy the selection to a
new file, size about 200x200, background pink or whatever. Keep
the band selected and turn the whole picture with
"Color" -"Gray scale" into a 256 gray-shade
picture. Copy the wing-band part again out of the file and paste
it to the position where you removed it from the skin.
Now you can play around with the Gamma-settings and
Brightness/Contrast, until it fits your needs.
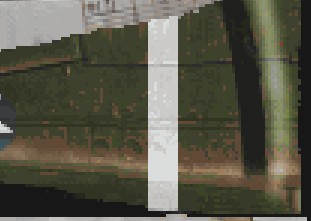 |
Easy, isn't it? Now, if you use the Finger and the option Color fit, then
you can turn this band into almost any color you want
(and which the EAW-palette supports, of course) . You may
need to play around with the contrast-settings.
You can use the Color fit of the Finger the way we used it with
"Huffy" or even the Color-Replacer from the start, but I've had
better experiences with the gray-scale technique. You'll need
to experiment on your own.
Open the EAW-palette to see if it fits your needs, if not,
undo and adjust the contrast, etc. If you make the band white,
take the Color-Replacer
anyway, use as
primary color No. 0 and as secondary No. 110, and move over the
fuselage band by pressing the right mouse-key. This replaces the
transparent color 0 with the gray 110, so no black sparkles
appear on the wings.
3.: Do a similar procedure
for the position of the band on the underside of the wings, ensuring the# band meets the upper side component exactly
at the edge of the wings . You'll need to experiment with
this and use the "undo"-option...maybe a lot...![]() .
.
4.: Add the band to the non-mirror-panels, again with element-masks to cover them finally.
5.: A red nose would look nice, don't you think? You can add this feature with the skills learned with the fuselage-band, gray-scale the nose parts, then colorizing them in red with one of the two possibilities I've explained.
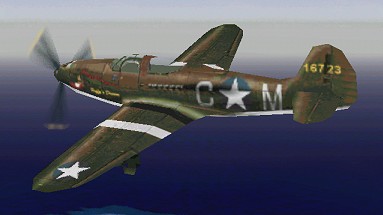
Alright, now we have our aircraft for the New Guinea campaign. Not historically correct, but now we have a personalized aircraft and know how to make more.
 |
![]()