
"How to add codes and markings"
![]()
This part of the tutorial gives an
introduction about how you can add your own codes, markings, kill-marks, etc. to
an existing skin, i. e. to create another historical pilot's plane, for use in an online-squad, a campaign or just to get a
"neutral" set of letters without mirror-effect.
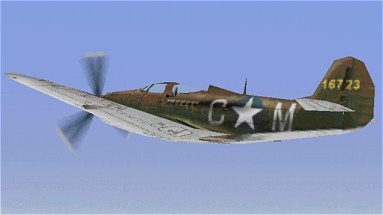
The plan
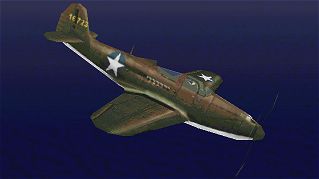
I take as base the Bell
P-39D Airacobra 35th FG USAAF, New Guinea 1942
 |
Download (450kb)
You have started a successful New Guinea-campaign with the Airacobra but got
bored about the fact that you do not have a personalized aircraft, although you
are already squadron-leader and a famous ace ![]() .
Now we are going to change that! We will add
.
Now we are going to change that! We will add
a) personal codes, in my example C *
M,
b) nose artwork and
c) some bright recognition lines on the wings.
I do not care about the mirror-effect in this example, but you may use codes
that are mirror able, like Y, I, O, M, X,, U, A, H or V, choice is up to you or
your needs. The plane that we make now is in no way historical accurate, but
with the used techniques it's possible to alter every possible skin to another
coded variant.
a) Codes
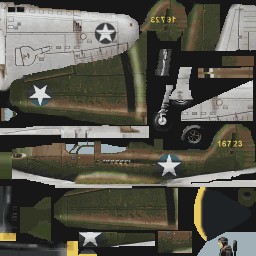
1.: Open
the file Pp51btex.pcx
that is included in the ZIP-file of the skin. What you will see is this:
 |
Save the palette of the plane by "Color" - "Save Palette...". Turn the file to 24bit-color depth with the menu "Color" - "Increase Color Depth". Now we are able to make the codes.
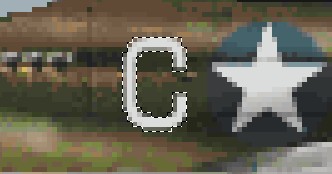
2.: Suck
up with the Dropper the brightest color in the
white star of the fuselage and keep this as primary color. Now, use the Text-tool
and write a C in the menu. Choose a font that is looking good to you. Maybe you
are in the lucky position that you have a good font for markings of aircraft,
but mostly you have to search this in the web, or use one of the standard-fonts,
they do the job also very well in most cases. Please make sure that you have
"Antialiased" enabled, you find this with
PSP 5 in the same window where you define the font-style.
Do not make the C too big, sizes between 10-20 proved to be good. With the font
"Eurostyle", I made it size 14, bold. Make the C and move it into the
position where you would like to have it. Keep the C selected all the time, it's
easier to paint the details this way in the next steps.
 |
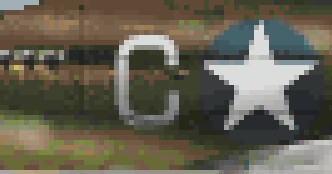
3.: You
notice that some fuselage-lines cross the code, and it looks like a sticker
attached to the skin if they are not included to the C. Take the Brush, size 1,
opacity 1-3, density 100, steps 1 and draw the lines carefully into the bright
C.
For the C, it's only subtle, some planes have a lot of lines that are crossed,
there it's more important to make them. But as always, do not exaggerate with
the effect!
4.: Take the Airbrush and the color black, set the Airbrush-options to size of about 24, opacity 5, density 100, steps about 25 and start to darken the code from the underside carefully. This adds a lot of depth-effect to it.
 |
5.: The
exhaust-dust covers the code, when we respect the laws of physics and aerodynamics...![]() . To imitate this effect, take
again the Airbrush and the color black, options to
size of about 9, opacity 5, density 100, steps about 25 and make slight stripes
in flight-direction. It's no problem when it touches the star, it gives the
impression that you flew a lot of missions with this plane...
. To imitate this effect, take
again the Airbrush and the color black, options to
size of about 9, opacity 5, density 100, steps about 25 and make slight stripes
in flight-direction. It's no problem when it touches the star, it gives the
impression that you flew a lot of missions with this plane...
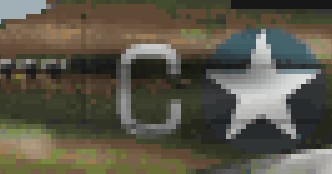 |
6.: Now add in a similar way the M behind the star-marking. Use again the brightest color from the star (which we made a bit dirty in the last step), and draw the M, with the same font and the same size as the C. Sometimes it may be necessary to change the size of the codes because they are too much bold, or need more fragile lines, etc. This can be achieved with the Deformation-tool. You will find out quickly how it works (only in 24bit or higher), and it's a great thing to use for special codes and markings.
7.: You may notice that there is a panel for the right fuselage-side. It's now a little "homework" to figure out a way how to fit the new painted left fuselage-side to this panel - a little hint: In the 109-tutorial we introduced element-maps...they are not only useful with 109s, believe me...
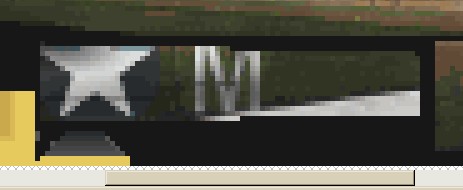 |
So, after we did that, we convert the plane back to the EAW-palette with "Colors" - "Open Palette..." and convert it with PicPac. Now it should look like this (more or less!):
 |
Wasn't that difficult, right? So let's move on to a decent nose-art.
![]()